The WordPress.com stats helper monkeys prepared a 2014 annual report for this blog.

Here’s an excerpt:
The concert hall at the Sydney Opera House holds 2,700 people. This blog was viewed about 10,000 times in 2014. If it were a concert at Sydney Opera House, it would take about 4 sold-out performances for that many people to see it.
Since the KitchenPC database adapter has to work with various database systems out of the box, it must use data types common to all dialects for column mappings. For example, the IngredientForms model has a UnitType property of type Units. Units is an enum in C#, but will be mapped to a string in SQL.
However, what if we want to use a custom type on our backend as well? For example, Postgres allows enumerable types to be defined, which could be useful here.
For this reason, KitchenPC comes with an easy way to define NHibernate conventions for enumerable types, which allow the user to override this default mapping. Let’s start by first defining an ENUM in Postgres for both Units and UnitType:
CREATE TYPE UnitType AS ENUM ('Unit', 'Volume', 'Weight');
CREATE TYPE Units AS ENUM ('Unit', 'Teaspoon', 'Tablespoon', 'FluidOunce', 'Cup', 'Pint', 'Quart', 'Gallon', 'Gram', 'Ounce', 'Pound');
Now, we have a new data type in Postgres that we can use for columns, function parameters, etc. Next, we need to map the C# UnitType enum to the Postgres UnitType enum, as well as Units with Units. We can do this using the handy EnumMapper class that comes with KitchenPC. It has a static method that builds an NHibernate IPropertyConvention instance, so it can be used fluently in the configuration:
var dbConfig = Configuration<DBContext>.Build
   .Context(DBContext.Configure
      .Adapter(DatabaseAdapter.Configure
         .DatabaseConfiguration(
            PostgreSQLConfiguration.PostgreSQL82
               .ConnectionString(@"Server=localhost;Port=5432;User Id=Website;Password=password;Database=KPCSample")
         )
         .AddConvention(EnumMapper<Units>.Convention)
         .AddConvention(EnumMapper<UnitType>.Convention)
      )
   ).Create();
Note we’re calling AddConvention twice, adding a convention to map Units to Units and UnitType to UnitType. What exactly is this class doing under the covers?
The code is pretty simple:
public class EnumMapper<T> : EnumStringType<T>
{
   public override SqlType SqlType
   {
      get
      {
         return new SqlType(DbType.Object);
      }
   }

   public static IPropertyConvention Convention
   {
      get
      {
         return ConventionBuilder.Property.When(
            c => c.Expect(x => x.Type == typeof (GenericEnumMapper<T>)),
            x =>
            {
               x.CustomType<EnumMapper<T>>();
               x.CustomSqlType((typeof (T).Name));
            });
      }
   }
}
First, we’re inheriting from the EnumStringType base class, which is what NHibernate will use by default to map an enum. However, we’re overriding the SqlType to cause NHibernate to treat this type as an object, not as a string. This will prevent NHibernate from doing silly things like trying to cast SQL parameters to text. Without this, we’d have:
INSERT INTO Foo (SomeEnumColumn) VALUES ('Cups'::text);
Where what we want is:
INSERT INTO Foo (SomeEnumColumn) VALUES ('Cups'); -- No cast
The Convention property builds an NHibernate convention that finds all mapped properties of type T, then sets their CustomType as well as the SQL type. The latter will be used to correctly provision the database using the new type. In other words, the CREATE TABLE commands will now use Units and UnitType.
So, there you have it; two lines you can add to your configuration to change how enums are mapped to the database. Two things to keep in mind. First, this code will not create those enums for you. You’ll need to do this yourself, and before you provision your database using InitializeStore. Second, notice we call CustomSqlType using typeof(T).Name, meaning the type name in your database must match the enum type in C#. If you wanted to change this, you’d have to write your own convention to do so.
The Beta version of KitchenPC allowed users to enter their own recipes, but it was such a giant pain, pretty much no one did it. The re-launch gave KitchenPC a new goal; to be a powerful recipe search engine, where existing recipes were collected from all over the Internet.
However, the KitchenPC platform allows you to add new recipes to the database. This could be done through a UI, an automated process, crawler, etc.
To do so, we use the fluent Recipes.Create action:
var result = context.Recipes
   .Create
   .WithTitle("Puff Pancake")
   .WithCredit("KitchenPC.com")
   .WithCreditUrl(new Uri("http://www.kitchenpc.com"))
   .WithImage(new Uri("http://images.kitchenpc.com/ccb1d90f-c49c-4271-8545-cdf6e2859444.png"))
   .WithCookTime(60)
   .WithPrepTime(15)
   .WithDescription("Great for breakfast!")
   .WithMethod("Mix everything together, pour in a glass pie dish, bake for 23 minutes at 400 degrees.")
   .WithRating(Rating.FiveStars)
   .WithServingSize(4)
   .WithTags(RecipeTag.Breakfast | RecipeTag.NoMeat | RecipeTag.Easy)
   .WithIngredients(i => i
      .AddRaw("4 eggs")
      .AddRaw("1 cup flour")
      .AddRaw("1 cup milk")
   )
   .Commit();
Obviously, some of these properties are optional, but you get the idea. The WithIngredients method is fairly flexible as to how you can express ingredients. The easiest way, as shown above, is to call AddRaw, which invokes the natural language parser to understand ingredient usages. As all recipes in KitchenPC must be normalized, KitchenPC will throw an exception if it is unable to parse an ingredient usage.
You can also manually specify an ingredient or usage, using AddIngredient or AddIngredientUsage:
.WithIngredients(i => i
   .AddIngredient(Ingredient.FromId(new Guid("948aeda5-ffff-41bd-af4e-71d1c740db76"))) // Eggs
)
Or, to specify an amount along with a prep note:
.WithIngredients(i => i
   .AddIngredientUsage(c => c
      .WithIngredient(Ingredient.FromId(new Guid("948aeda5-ffff-41bd-af4e-71d1c740db76"))) // Eggs
      .WithForm(IngredientForm.FromId(new Guid("28c374f6-2bd7-4085-a053-f68d0565050a")))   // Unit form
      .WithAmount(4, Units.Unit)
      .WithPrepNote("beaten")
   )
)
You can also divide your ingredients up into sections, which is frequently used to separate parts of a recipe (the cake part and the frosting part, for example). Let’s add some fruit toppings to our puff pancake.
.WithIngredients(i => i
   .AddRaw("4 eggs")
   .AddRaw("1 cup flour")
   .AddRaw("1 cup milk")
)
.WithIngredients("toppings", i => i
   .AddRaw("bananas")
   .AddRaw("maple syrup")
)
.Commit();
Now, we have our main ingredients in an unnamed section, and bananas and maple syrup in a section called toppings.
I think I know what I’m eating for breakfast tomorrow.
KitchenPC, as well as most open-source .NET projects, uses log4net for all internal logging. If you’re already familiar with log4net, most of this post will be fairly useless for you. Just note you can configure log4net appenders to see various KitchenPC activity.
For the rest of you, here’s a basic tutorial. First, you’ll need to reference log4net in your project. This can be done manually, or by running:
Install-Package log4net
in the NuGet console.
Once you have log4net added to your project, you need to configure it. You can do this in one line of code using:
BasicConfigurator.Configure();
However, this will dump an absolutely insane amount of data to your console which you probably don’t want. Instead, it’s best to configure log4net in your application’s .config file. For this, add the following line of code:
XmlConfigurator.Configure();
Then create the following section in your .config file:
<configSections>
   <section name="log4net" type="log4net.Config.Log4NetConfigurationSectionHandler, log4net"/>
</configSections>
This must appear at the top of the config file, as the first child to the configuration node. You might already have that node, in which case just add the <section> tag. Next, add the following element to the configuration section:
<log4net>
   <appender name="Trace" type="log4net.Appender.ConsoleAppender, log4net">
      <layout type="log4net.Layout.PatternLayout,log4net">
         <param name="ConversionPattern" value="[%level] - %m%n"/>
      </layout>
   </appender>
   <root>
      <level value="ERROR"/>
      <appender-ref ref="Trace"/>
   </root>
   <logger name="KitchenPC.Context">
      <level value="DEBUG"/>
   </logger>
   <logger name="KitchenPC.DB.Provisioning">
      <level value="DEBUG"/>
   </logger>
   <logger name="KitchenPC.NLP">
      <level value="DEBUG"/>
   </logger>
   <logger name="KitchenPC.Modeler">
      <level value="DEBUG"/>
   </logger>
</log4net>
You can control individual configurations of the various KitchenPC loggers. This uses the ConsoleAppender, which writes data out to the console, but log4net comes with various other appenders depending on how you want your data logged, and which events should be logged where. You can read about how to configure these appenders here.
There’s also one more interesting logging feature of KitchenPC, and that’s the NLP tracing logger. The NLP engine is so complicated, it has the ability to trace into individual queries and diagnose exactly how the query was parsed. You can enable an NLP tracer using the NlpTracer.SetTracer() method. This method takes an ITracer implementation which basically has a single method, Trace. The NLP engine will call it if one is configured.
You can write your own ITracer which does whatever you wish with the log data, but there is a default tracer which simply logs each trace event using log4net. Note, this is much more detailed than the standard NLP logging. To configure this trace, you’d use:
NlpTracer.SetTracer(new DefaultTracer()); // Log NLP to log4net
Now if we run the query:
var test = KPCContext.Current.ParseIngredientUsage("a dozen bananas");
We can see the NLP trace:
[DEBUG] - Loaded Template: [ING]
[DEBUG] - Loaded Template: [ING]: [AMT] [UNIT]
[DEBUG] - Loaded Template: [ING]: [AMT]
[DEBUG] - Loaded Template: [FORM] [ING]: [AMT]
[DEBUG] - Loaded Template: [FORM] [ING]: [AMT] [UNIT]
[DEBUG] - Loaded Template: [AMT] [UNIT] [FORM] [ING]
[DEBUG] - Loaded Template: [AMT] [UNIT] [ING]
[DEBUG] - Loaded Template: [AMT] [UNIT] of [ING]
[DEBUG] - Loaded Template: [AMT] [UNIT] of [FORM] [ING]
[DEBUG] - Loaded Template: [AMT] [ING]
[DEBUG] - Loaded Template: [AMT] [UNIT] [FORM], [ING]
[DEBUG] - Loaded Template: [AMT] [FORM] [ING]
[DEBUG] - Loaded Template: [AMT] [ING], [PREP]
[DEBUG] - Loaded Template: [AMT] [UNIT] [ING], [PREP]
[DEBUG] - Loaded Template: [AMT] [UNIT] [FORM] [ING], [PREP]
[DEBUG] - Loaded Template: [AMT] [ING] - [PREP]
[DEBUG] - Loaded Template: [AMT] [UNIT] [ING] - [PREP]
[DEBUG] - Loaded Template: [AMT] [UNIT] [ING] (optional)
[DEBUG] - Loaded Template: [AMT] [UNIT] [FORM] [ING] (optional)
[DEBUG] - Loaded Template: [AMT] [UNIT] [ING] (divided)
[DEBUG] - Loaded Template: [AMT] [UNIT] [ING], divided
[DEBUG] - Loaded Template: [AMT] [UNIT] [ANOMALY]
[DEBUG] - Loaded Template: [AMT] [UNIT] [ANOMALY], [PREP]
[DEBUG] - Loaded Template: [AMT] [UNIT] [ANOMALY] - [PREP]
[DEBUG] - Loaded Template: [AMT] [ANOMALY]
[DEBUG] - Loaded Template: [AMT] [ANOMALY], [PREP]
[DEBUG] - Loaded Template: [AMT] [ANOMALY] - [PREP]
[INFO] - Usage "a dozen bananas" matches the grammar "[AMT] [ING]"
[DEBUG] - [BuildResult] Ingredient: bananas
[DEBUG] - [BuildResult] No custom unit found, so cannot get form based on unit.
[DEBUG] - [BuildResult] No known form found, so cannot get form based on form synonym.
[DEBUG] - [BuildResult] Linking to default Unit paired form 638df06b-780c-4e0d-a3bd-f2986e235fc6
[INFO] - [BuildResult] SUCCESS: Linked form is compatible with usage reference.
Here, we have a successful parse. First, we looped through a bunch of grammar templates to see if any of them matched our input. The template [AMT] [ING] (an amount followed by an ingredient, “a dozen” being an amount and “bananas” being an ingredient) matched. The match data didn’t contain any custom form, such as “slices” or “heads” or what not. In fact, there was no form specified at all, so it was linked with the default form, which is “Units”. Lastly, it verified units of bananas was a valid way to express bananas, which it was, so we have a successful match.
Now, let’s run a query that doesn’t make any sense.
var test = KPCContext.Current.ParseIngredientUsage("5 cheese");
Here, we get the following trace:
[INFO] - Usage "5 cheese" matches the grammar "[AMT] [ING]"
[DEBUG] - [BuildResult] Ingredient: cheese
[DEBUG] - [BuildResult] Re-Link to Root Ingredient: cheddar cheese
[DEBUG] - [BuildResult] No custom unit found, so cannot get form based on unit.
[DEBUG] - [BuildResult] No known form found, so cannot get form based on form synonym.
[DEBUG] - [BuildResult] Could not find any default pairing for the unit type: Unit
[DEBUG] - [BuildResult] Running anomalous parsing.
[DEBUG] - [BuildResult] Could not clarify form through prep note, since unit type is not volumetric or there is no prep note.
[DEBUG] - [BuildResult] Could not auto-convert form since there is no form to convert.
[DEBUG] - [BuildResult] ERROR: Anomalous parsing could still not find a form for this usage.
[INFO] - Could not find match for usage: 5 cheese
Now, the input 5 cheese does match a template. We parsed out the ingredient, which is cheese. However, cheese is an ingredient synonym, so it’s actually resolved to its root ingredient, cheddar cheese. Again, no unit was specified nor any form. However, here’s where we go wrong. There is no default pairing for whole units, as there was with bananas. Meaning, KitchenPC does not know how to process a whole number of cheeses. At this point, we kick in the anomalous parser, which is basically calling in the big guns. Sometimes, we have weird ways to express ingredients that don’t logically make sense, but humans will basically know what it means through intuition. For example, sometimes a prep note can clarify what they mean. An example of this would be something like “3 crushed graham crackers”. Well, in this case, 3 is not a valid measurement for the volumetric form crushed, however graham crackers do have a prep note called crushed, so it’s able to interpret this as “3 graham crackers (crushed)”. In this case, we can’t do this. At this point, the anomalous parser gives up, so we return a result of NoForm. This error indicates we understood the ingredient, but not the form it was expressed in.
Is this useful to you? Well, possibly if you’re tinkering with the NLP parser or adding ingredient data to the database. If not, you can go about your day.
As I mentioned before, KitchenPC is able to connect to a SQL database using the DBContext context type, and a configured IDBAdapter, such as the DatabaseAdapter found in KitchenPC.DB.dll. What you may not know is KitchenPC contexts are able to talk with each other, and migrate data between themselves. They can also configure their own data stores. This means DBContext can create a database for you, with the default schema, and copy the data from a StaticContext’s KPCData.xml file.
Database provisioning made easy.
So, how do we do all this? First, we need to set up two contexts. Hold on a second. Two contexts? But, I thought there could only be a single context in a process. Well, I lied. You can create as many contexts as you wish, only one can be the initialized context available through KPCContext.Current.
First, we need a database. I use PostgreSQL, so my syntax will match that.
CREATE DATABASE "KPCSample"
  WITH ENCODING='UTF8'
       OWNER="Website"
       CONNECTION LIMIT=-1;
Now, we have a completely blank database with no tables or anything.
Next, let’s create a DBContext and a StaticContext:
// Context connected to local database
var dbConfig = Configuration.Build
   .Context(DBContext.Configure
      .Adapter(DatabaseAdapter.Configure
         .DatabaseConfiguration(
            PostgreSQLConfiguration.PostgreSQL82
               .ConnectionString(@"Server=localhost;Port=5432;User Id=Website;Password=password;Database=KPCSample")
               .ShowSql()
         )
      )
   ).Create();

// Context connected to local data store
var staticConfig = Configuration.Build
   .Context(StaticContext.Configure
      .DataDirectory(@"C:\KitchenPC\ConsoleTest\LocalStore\")
   )
   .Create();
At this point, we have configuration builders for both contexts, and the DBContext is configured to logon to the database we just created. The StaticContext points to a directory that has KPCData.xml.
Now, we’ll add this:
var dbContext = dbConfig.Context as DBContext;
dbContext.InitializeStore();
Go ahead and run your program now, just to make sure the database stuff works and what not. In theory, it should pause for a bit and then you’ll have a created database with 18 tables, all empty. If not, hopefully it threw some sort of helpful exception.
Ok, now we have a database. Which means we can populate it with data. We’ll get this data from our StaticContext. You can comment out the .InitializeStore() line since you don’t need to run it again, but if you do run it again, it will simply drop the tables and re-create them. Yes, InitializeStore() is a very dangerous method; be careful with it.
var staticContext = staticConfig.Context as StaticContext;
staticContext.Initialize();
dbContext.Import(staticContext);
First, we need to intialize the StaticContext. A context must be initialized before you can import from it, since the data must be loaded into memory. We could also use KPCContext.Initialize() to do this, which in turn calls .Initialize() on the context, but we don’t really need to set a global context in this case.
The next line calls Import() on the DBContext instance. Note, we do not initialize the DBContext. Doing so would have thrown an exception, because none of the data exists for it to initialize yet. In other words, the context you’re importing the data from must be initialized so said data is available, but the context you’re importing the data into should not be initialized.
The .Import() method accepts an IProvisionSource, which both StaticContext and DBContext implement. So, you’d do the exact thing in reverse if you wanted to pull data from your database and dump it into a static XML file on disk.
When you run this, it’ll import all the data from KPCData.xml into your database. After that, you’ll be able to initialize the DBContext context and use KitchenPC.
Since this is a short post, I thought I’d throw out one more trick. The StaticContext is also able to compress its data on disk. When you initialize your StaticContext, you can say:
var staticConfig = Configuration.Build
   .Context(StaticContext.Configure
      .DataDirectory(@"C:\KitchenPC\ConsoleTest\LocalStore\")
      .Identity(() => new AuthIdentity(new Guid("c52a2874-bf95-4b50-9d45-a85a84309e75"), "Mike"))
      .CompressedStore
   )
   .Create();
The CompressedStore flag will cause the context to look for a file called KPCData.gz instead of KPCData.xml, which is a GZip compressed version of the XML file. When StaticContext imports data, it will create a compressed file. When you initialize it, it will look for a compressed file on disk. If you configure StaticContext to use a compressed file, but only KPCData.xml exists, it will throw a file not found error. In the future, there might be a mechanism to compress a currently uncompressed file, but for now, you can just use 7-Zip or what not.
Getting up and running with KitchenPC is hopefully an easy process. First, KitchenPC is written in C# which means it can be used with any .NET language. My examples (and future documentation) will be in C#, but feel free to use VB.Net or any other CLR compliant language. If you’re compiling from source, you’ll need to add a reference to KitchenPC.dll.
Mono should also be fine, though I haven’t done a lot of testing with this compiler and runtime. Eventually, Mono will be officially supported.
The first concept to understand is contexts.
What Is a Context?
Basically any interaction with the KitchenPC API is done through a context. A context can be thought of as a session with KitchenPC, similar to a connection with a database. At a lower level, a context provides KitchenPC with the ability to figure out who the current user is, how to save and load data, and the configuration of the environment it’s running in. In summary, a context wraps up everything KitchenPC can do into a nice package with a common interface.
At a technical level, a context is any class that implements IKPCContext. This interface has methods for things like initialization, saving data, loading data, parsing ingredient usages, etc. While you are more than welcome to implement your own IKPCContext, KitchenPC comes with two implementations out of the box! They are…
StaticContext
A StaticContext is, by far, the easiest way to get started with KitchenPC. This context loads all its required data from an XML file on disk. It also doesn’t save any changes to disk. Any modifications will be lost when the process ends. The most important thing to keep in mind about StaticContext is it is absolutely, positively not designed to be used in any production capacity. Do NOT use this context on your website or with any production code. It’s a playground; a way to mess around with KitchenPC to see how it works by providing a super easy solution to get up and running. This context is in no way thread safe. The performance is horrendous (pretty much any search operation will be O(n) at best!) It’s designed to hold maybe a few dozen recipes and data for a single user; any more than that, expect everything to quickly be unusable. Luckily, since the interface with any context is the same, you can start out using StaticContext and switch to another one when you’re ready.
So, how do you go about creating a StaticContext? Well, let’s jump into some code! Finally!
// Context connected to local data store
var staticConfig = Configuration<StaticContext>.Build
   .Context(StaticContext.Configure
      .DataDirectory(@"C:\KitchenPC\ConsoleTest\LocalStore\")
      .Identity(() => new AuthIdentity(new Guid("c52a2874-bf95-4b50-9d45-a85a84309e75"), "Mike"))
   )
   .Create();

KPCContext.Initialize(staticConfig);
Ok, so a few things going on here. First, a context is initialized by creating a configuration, which can be done fluently using Configuration<T>.Build, where T is an implementation of IKPCContext. The first method is .Context, which takes a ConfigurationBuilder<T>, which are obtainable using the static .Configure property of the context. The ConfigurationBuilder for StaticContext allows us to set a few properties relevant to this context.
The DataDirectory is a path on the local file system that contains a file called KPCData.xml. A sample of this file will be available with the source code or binaries, and will contain a few sample recipes, shopping lists, menus, etc. This will allow you to experiment with realistic data without having to create it yourself.
The .Identity method takes a Func<AuthIdentity> parameter, which can reference any function that returns an AuthIdentity (basically, a representation of a user in the KitchenPC universe). Since a context exists in static memory, it can be shared by different threads. For example, if you were building a website, you would run that above code in the Application_Start, and implement .Identity to figure out who the current user was, based on cookies or what not. In our example, we just hard code the function to return a user named Mike, which happens to exist in our sample KPCData.xml file.
At this point, staticConfig is a IConfiguration<StaticContext> object, which holds everything needed to create a context based on that configuration. Next, we just need to initialize that context, which loads necessary data into memory (in this case, from the XML file) so things like parsing and recipe modeling work. This is an expensive operation, so it should only be done once when your process starts. Eventually, you’ll be able to enable and disable individual features, which will help speed up the initialization process. For now, it takes several seconds.
We call the static method KPCContext.Initialize() and pass in our configuration. KPCContext.Initialize will create the context, initialize everything, and set the current context within your process. From this point on, KPCContext.Current will refer to our context.
DBContext
You’ve probably already guessed what the other out of the box context is; DBContext. This context is able to connect KitchenPC with a SQL database, used for saving and loading data in a relational way. This context was pretty much designed around the schema of my KitchenPC website database. The DBContext class actually doesn’t do that much, because it requires an implementation of IDBAdapter to actually work. IDBAdapter tells a DBContext how to actually talk to a specific database. If you wanted to connect KitchenPC to another store, such as Mongo or memcache or your own made up thing, implementing IDBAdapter is where you’d want to start.
Luckily for you, KitchenPC also comes with an implementation of IDBAdapter as well! This implementation is called DatabaseAdapter, and is available in KitchenPC.DB.dll, which you’ll need to reference if you plan on using it. I decided to split these up into different assemblies because KitchenPC.DB.dll has a more complicated set of dependencies, and I wanted to make the core KitchenPC engine a really quick and easy download.
DatabaseAdapter is a general purpose database adapter built on NHibernate. This allows DatabaseAdapter to pretty much talk to any common SQL database, such as Microsoft SQL Server, Oracle, mySQL, or my favorite, PostgreSQL. In general, if NHibernate supports it, you can use it.
Writing a general purpose SQL adapter has its drawbacks. Since different RDMS platforms have their own features and ways of optimizing, DatabaseAdapter can only support the lowest common denominator. For example, since there’s no SQL standard implementation of full text search, recipe searching must be done with standard SQL syntax (such as using a non-indexable LIKE operator for keyword searches). Luckily, DatabaseAdapter provides various virtual methods you can override to control exactly how it interacts with your database, or you can always write your own IDBAdapter implementation which controls exactly how everything should work. I’m tempted to write a PostgreSQL specific adapter, just because it has so many cool features that I wasn’t able to port over from my website code.
Creating an instance of DBContext is slightly more complex, since we have to configure the context and the adapter. We can do the whole thing fluently as well:
// Context connected to local database
var dbConfig = Configuration<DBContext>.Build
   .Context(DBContext.Configure
      .Adapter(DatabaseAdapter.Configure
         .DatabaseConfiguration(
            PostgreSQLConfiguration.PostgreSQL82
               .ConnectionString(@"Server=localhost;Port=5432;User Id=Website;Password=password;Database=KPCTest")
               .ShowSql()
         )
         .SearchProvider(NHSearch.Instance)
      )
      .Identity(() => new AuthIdentity(new Guid("c52a2874-bf95-4b50-9d45-a85a84309e75"), "Mike"))
   ).Create();
Let’s take a look at what’s going on here. It looks similar to StaticContext, only we’re passing in a DBContext.Configure builder instead. This builder has a method called Adapter, which takes an IConfigurationBuilder object, which can be obtained through DatabaseAdapter.Configure. If you were writing your own database adapter, you’d probably also want to write your own IConfigurationBuilder.
The DatabaseAdapter configuration builder has a method called DatabaseConfiguration, which directly takes in an NHibernate IPersistenceConfigurer object. This will be familiar to anyone who has used NHiberate before. In this example, we’re creating a PostgreSQLConfiguration which will use the PostgreSQL dialect to talk with the database. This configurer also takes a connection string used to connect. The .ShowSql() method tells NHibernate to log SQL statements to the console window. You can comment that out if you don’t want to clutter your console.
The DatabaseAdapterBuilder also has a SearchProvider method. This method takes a Func<DatabaseAdapter, T> (a function that takes a DatabaseAdapter and returns a T), where T is an implementation of ISearchProvider. As I said before, recipe searching is so database dependent, I predict it will be a very common scenario to want to implement your own searching mechanism. If you wanted to use, say, Lucene.NET for searching, implementing ISearchProvider is where you’d start. However, you can use the built-in NHSearch search provider, which uses standard SQL to search for recipes. It’s not super fast, but it’ll probably do for the common website.
Once again, you’d just call KPCContext.Initialize(dbConfig); to initialize the context. This will be quite a bit slower since it needs to load in various KitchenPC data from the database and index it into memory. Again, you’d do this once every time your application starts. One nice thing about DBContext is the initialization mechanism is multi-threaded, so you can actually start to use the context right away. If you do anything that requires a fully initialized context (such as NLP or the recipe modeler), the thread will be blocked until initialization is complete.
The DatabaseAdapter obviously expects some sort of schema to exist, with default data to load. Luckily for you, DBContext is actually able to do all the database provisioning for you! However, we’ll get more into that later. In fact, this will most likely be the very next post.
So, I have a context. Now what?
Now, you can interact with KitchenPC and experiment. It doesn’t matter what context you’re using, all the code will be the same. This allows you to quickly change contexts without changing any of your application code.
For the most part, interacting with KitchenPC is done fluently using one of the five action categories.
Recipes
context.Recipes allows you to interact with recipes into the database. For example, if you wanted to load the sample Weeknight Cheese Quiche recipe, as well as Berry-Good Mousse, you’d use:
var context = KPCContext.Current;
var recipes = context.Recipes
   .Load(Recipe.FromId(new Guid("ee371336-c183-448d-889c-d6b1f767bf59"))) // Weeknight Cheese Quiche
   .Load(Recipe.FromId(new Guid("e6ab278f-5f4d-4249-ab7d-8f66af044265"))) // Berry-Good Mousse
   .WithMethod
   .WithUserRating
   .List();
Notice the Load action takes a Recipe object, which is used globally within KitchenPC to represent a recipe. Perhaps these Recipe objects came from some other piece of data, such as a user’s menu. In this case, we’re just creating them based on their raw ID in the database.
Also, notice how we can chain up multiple recipes to load as well. You can add as many calls to .Load as you want, and it will load all the necessary data in a single database call. The Fluent interface behind KitchenPC allows us to batch up complicated calls into single database operations.
There’s also a few properties. The WithMethod property indicates we want to load the recipe methods as well (which can get long), and WithUserRating JOINs in the user’s rating data to see if they’ve rated the recipe before. At the end of the Fluent expression, we call .List() which performs the database call (or, digs through the XML file) and returns an IList<> of Recipes.
It’s important to keep in mind absolutely nothing is done *until* that .List method is called, so you can programatically manipulate that query or add more conditions at runtime before materializing the data.
Menus
Now, suppose we wanted to create a menu for the current user. The Menus action lets us manipulate menus. For example, if we wanted to add our quiche recipe to a new menu called My New Menu, we’d simply do:
var result = context.Menus
   .Create
   .WithTitle("My New Menu")
   .AddRecipe(Recipe.FromId(new Guid("ee371336-c183-448d-889c-d6b1f767bf59"))) // Weeknight Cheese Quiche
   .Commit();
The Create action creates a new menu. We then set a title, and add a recipe. AddRecipe can of course be called any number of times. When we call .Commit(), the menu is created and a result is returned. This result has the ID of the newly created menu.
Oops, we forgot to add our Mousse recipe as well! Well, let’s update the menu!
context.Menus
   .Update(Menu.FromId(result.NewMenuId.Value))
   .Add(Recipe.FromId(new Guid("e6ab278f-5f4d-4249-ab7d-8f66af044265"))) // Berry-Good Mousse
   .Rename("Renamed Menu")
   .Commit();
Here, we’re updating an existing menu and adding another recipe to it. Oh, while we’re at it, let’s rename the menu to “Renamed Menu” just for fun.
Shopping Lists
Shopping Lists are a fun one. It really ties together a lot of the raw power behind KitchenPC. We can aggregate recipes, add arbitrary ingredients in, and even throw in any ol’ random thing like paper towels. KitchenPC will automatically combine like ingredients, convert amounts and units, etc.
KitchenPC can track multiple shopping lists for a single user, but all users have a default shopping list which can be referred to using ShoppingList.Default. Let’s add a bunch of items to our default shopping list!
context.ShoppingLists
   .Update(ShoppingList.Default)
   .AddItems(a => a
      .AddRecipe(Recipe.FromId(new Guid("ee371336-c183-448d-889c-d6b1f767bf59"))) // Weeknight Cheese Quiche
      .AddIngredient(Ingredient.FromId(new Guid("948aeda5-ffff-41bd-af4e-71d1c740db76"))) // Eggs
      .AddItem("12 bananas")
      .AddItem("paper towels")
   )
   .Commit();
In this code, we’re updating an existing list (ShoppingList.Default), and adding a bunch of items. First, we’re adding in a recipe. It’s our quiche recipe again. Next, we’re throwing in eggs, which is probably already in the quiche so those ingredients will be combined. Next, we’re adding in “12 bananas”. This string will be parsed using natural language parsing, and converted into a normalized ingredient and amount. In other words, if I added 3 more bananas, I’d have 15 bananas in my shopping list. We also add in “paper towels” which can not be parsed using NLP, so this item will just be added as text.
This method will return a fully normalized ShoppingList object, which will allow you to get the item IDs for each item in the list. The item IDs are important for when you want to update an existing item in the shopping list:
Let’s update two imaginary items in our list:
context.ShoppingLists
   .Update(ShoppingList.Default)
   .UpdateItem(ShoppingListItem.FromId("d7506487-83e3-4893-ade9-aa6e685810fe"), u => u
      .CrossOut
   )
   .UpdateItem(ShoppingListItem.FromId("4e479943-0c21-4624-a3b9-1f63722cee8f"), u => u
      .NewAmount(new Amount(3, Units.Cup))
   )
   .Commit();
Here, we’re crossing out one item (this allows you to create interfaces where shopping list items can be crossed out without actually removing them) and setting the amount of another item to 3 cups. You can only change the amounts or crossed-out state using UpdateItem. If you want to actually change the text or ingredient itself, you have to remove the old one and add a new one.
Queue
Remember the queue? Well, it’s back. The queue provides the user with a way to store arbitrary recipes without having to store them in a menu.
Adding recipes to the queue is easy:
context.Queue
   .Enqueue
   .Recipe(Recipe.FromId(new Guid("ee371336-c183-448d-889c-d6b1f767bf59"))) // Weeknight Cheese Quiche
   .Recipe(Recipe.FromId(new Guid("e6ab278f-5f4d-4249-ab7d-8f66af044265"))) // Berry-Good Mousse
   .Commit();
As is removing a recipe:
context.Queue
   .Dequeue
   .Recipe(Recipe.FromId(new Guid("e6ab278f-5f4d-4249-ab7d-8f66af044265"))) // Berry-Good Mousse
   .Commit();
Bye-bye Mousse. Want to clear the entire queue?
context.Queue
   .Dequeue
   .All
   .Commit();
Easy enough.
Modeler
Ah, the modeler. Also known as What Can I Make?. I like the feature, though it never took off on my site. Still, it’s pretty cool technology that lets you figure out what recipes you can make based on what ingredients you have available.
The modeler is extremely complicated, so I hope to devote future blog posts to it. However, it runs under the context of a modeling session. A modeling session describes the goals of the user; for example, what ingredients they have, what they don’t like, what recipes not to repeat, etc. You can also use the modeler under an anonymous context, which means We don’t know anything about this user:
var results = context.Modeler
   .WithAnonymous
   .NumRecipes(5)
   .Generate();
This just means give me five recipes. The results will contain a list of recipe IDs and a score indicating how efficient the set is. You can set the .Scale property if you want to control if sets should be more efficient or higher rated. You can also compile the results, which means load in the full recipe briefs and create a normalized ingredient set containing all the ingredients and amount you would need to create those recipes. This is how I was able to draw real time shopping lists on my web site.
var results = context.Modeler
   .WithAnonymous
   .NumRecipes(5)
   .Compile();
This returns a CompiledModel object, which has recipe and aggregation data. I’ll get more into this in a separate post.
Now, instead of using WithAnonymous, you can also use WithProfile. WithProfile takes an IUserProfile implementation which tells the modeler about your user. On my website, I had an implementation that loaded their favorite tags, their blacklist, their pantry, all that stuff. You could, of course, implement this yourself based on your needs. However, you can also build your own profile fluently.
var bananas = context.ParseIngredientUsage("12 bananas");
var carrots = context.ParseIngredientUsage("carrots");

var results = context.Modeler
   .WithProfile(p => p
      .AddBlacklistedIngredient(Ingredient.FromId(new Guid("948aeda5-ffff-41bd-af4e-71d1c740db76"))) // No Eggs!
      .FavoriteTags(RecipeTag.Dessert | RecipeTag.GlutenFree) // I love gluten free desserts!
      .AddPantryItem(bananas.Usage) // I have 12 bananas
      .AddPantryItem(carrots.Usage)    // I have carrots
   .NumRecipes(5)
   .Compile();
First, we’re using the NLP engine to parse “12 bananas” and “carrots” into normalized ingredient usages so we can use them to construct a pantry.
Next, we create a profile for this session. First, we’ll blacklist eggs. The modeler will not return any recipe that calls for eggs. We indicate we like desserts and gluten free recipes, so the modeler will score those recipes higher. We’ll also indicate we have 12 bananas and an unspecified amount of carrots. The modeler will attempt to efficiently use those ingredients, then compile them into a set of results for us.
I have no idea if my sample database will come up with anything for that query, but you get the idea.
What’s Next?
Feel free to mess around with these examples and come up with your own scenarios. This post hasn’t even scratched the surface of what all is possible. I hope to post many more articles focusing on individual subjects, so please email me if you have any suggestions on topics. If you have any ideas, or find things that blow up spectacularly, let me know! Have fun!
Hey everyone! It’s been a while, but I have some exciting news. After about a year of thinking about exactly what I wanted to do with KitchenPC, I’ve come to the decision to open source the majority of the source code behind the website.
There’s a few reasons for this. First off, it’s a fantastic way to give back to the community. I built KitchenPC using several open source technologies. PostgreSQL is the big one, as well as frameworks such as NHibernate, YUI, Castle, and Json.NET. It seems only fair that I give back to that community, in hopes that others can innovate further using the code I’ve spent years developing. Code that can understand recipes, relationships between ingredients, natural language, and classifications. Second, it creates an opportunity for KitchenPC to realize its full potential. As a consumer website, it didn’t work. That’s because consumer websites almost never work. Apparently, the world didn’t need a way to organize meal plans or another search engine. However, the technology behind KitchenPC, if I do say so myself, is awesome. I’m sure a lot of the code I’ve written can help others develop products that actually do gain traction, and I’d love for KitchenPC to live on through that purpose. As an open source product, it also provides the ability for others to contribute. It allows KitchenPC to become something that one person alone cannot achieve.
So, you may ask, what exactly are you open sourcing? The web site? The database? A bunch of HTML code? Just dumping everything online and hoping for the best?
Well, I’ve spent the last couple months trying to figure out exactly where to draw that line. An open source website isn’t really all that useful, as there doesn’t really need to be a bunch of KitchenPC clones out on the web. My site never really gained much traction, so it’s fair to say my implementation didn’t lead to anything viable. However, I think a lot of the technology itself can help others who are building recipe related projects. Whether those projects are websites, mobile apps, tablet apps, Windows Store Apps, or even research projects, I think the code I’ve built can be re-factored in a generic way to provide a fantastic starting point.
Over the past three years, I’ve gotten dozens of emails from other entrepreneurs working on similar and exciting projects, and many have expressed interest in what I’ve built and asked if it could help them achieve their goals. Well, I’m hoping the answer is “Yes.”
What is the KitchenPC Platform?
Therefore, today, KitchenPC is being re-invented as an open source platform used to provide a standardized model for interacting with recipes, shopping lists, and menus. I’ve stripped out all the UI components from KitchenPC and re-organized the code as a set of APIs used for working with recipe related data. These APIs are database agnostic and fully extensible to encapsulate a wide variety of uses. My goal is to make getting started with KitchenPC quick and easy, with a low learning curve. However, once you dive in, you’ll be able to customize exactly how the engine behaves and use as much or as little of the platform as you wish.
The KitchenPC Platform is free and open source, licensed under the MIT License. It’s currently available on GitHub, and soon to be available through NuGet as well.
The early versions will be unstable and in a constant state of flux, so early adopters can expect lots of breaking changes, weird exceptions, and scenarios I didn’t account for. That’s why I’m looking to find a few testers who want to mess around with the code, develop prototypes, and provide feedback on what works and what doesn’t.
My next several posts will be geared around working with this code, explaining the architecture of the platform, and lots and lots of examples. Enjoy!
The WordPress.com stats helper monkeys prepared a 2013 annual report for this blog.

Here’s an excerpt:
The concert hall at the Sydney Opera House holds 2,700 people. This blog was viewed about 9,800 times in 2013. If it were a concert at Sydney Opera House, it would take about 4 sold-out performances for that many people to see it.
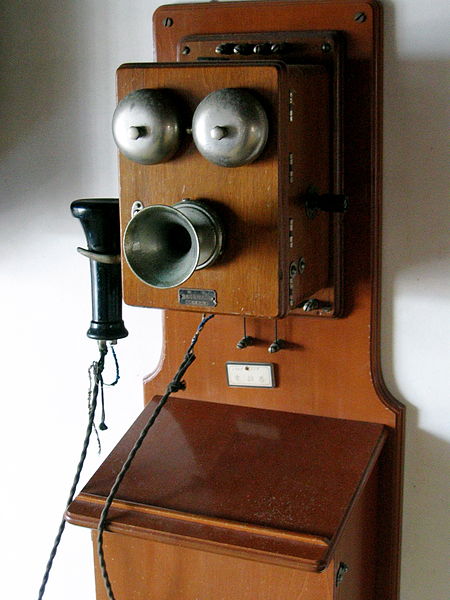
I love text messaging. Never before has there been such an easy way to communicate instantly with anyone else in the world, at any time. I’m texting people constantly.
In fact, the other day as I was driving home from the gym, my girlfriend sent me a text message which I wanted to respond to right away. However, to avoid texting while driving, I decided to use the speech to text feature of the messaging app so I could simply respond with my voice and have that translated into a text message. Innovation is fantastic!
Now, having to read text is somewhat cumbersome and not always convenient. What would be truly innovative is the ability to have a text message read back to you in a human-sounding voice. More innovation!
Lastly, what would be absolutely perfect is if the synthesized voice could somehow mimic the sound of the sender’s voice, to avoid sounding too robotic and create an extra personal touch.
Here’s a basic prototype of what this true pinnacle of communication technology might look like. Can someone start working on this?
I adore Restaurant Zoë. I first discovered it during Dine Around Seattle, when they offered a three-course dinner for $30 bucks. I’ve been going back ever since. They were closed for a few months while they moved from Belltown to Capital Hill, but their new location is top notch as well. I figured it would be an excellent choice for Mystery Meet, and the chef did not disappoint.

Chilled Pea Soup
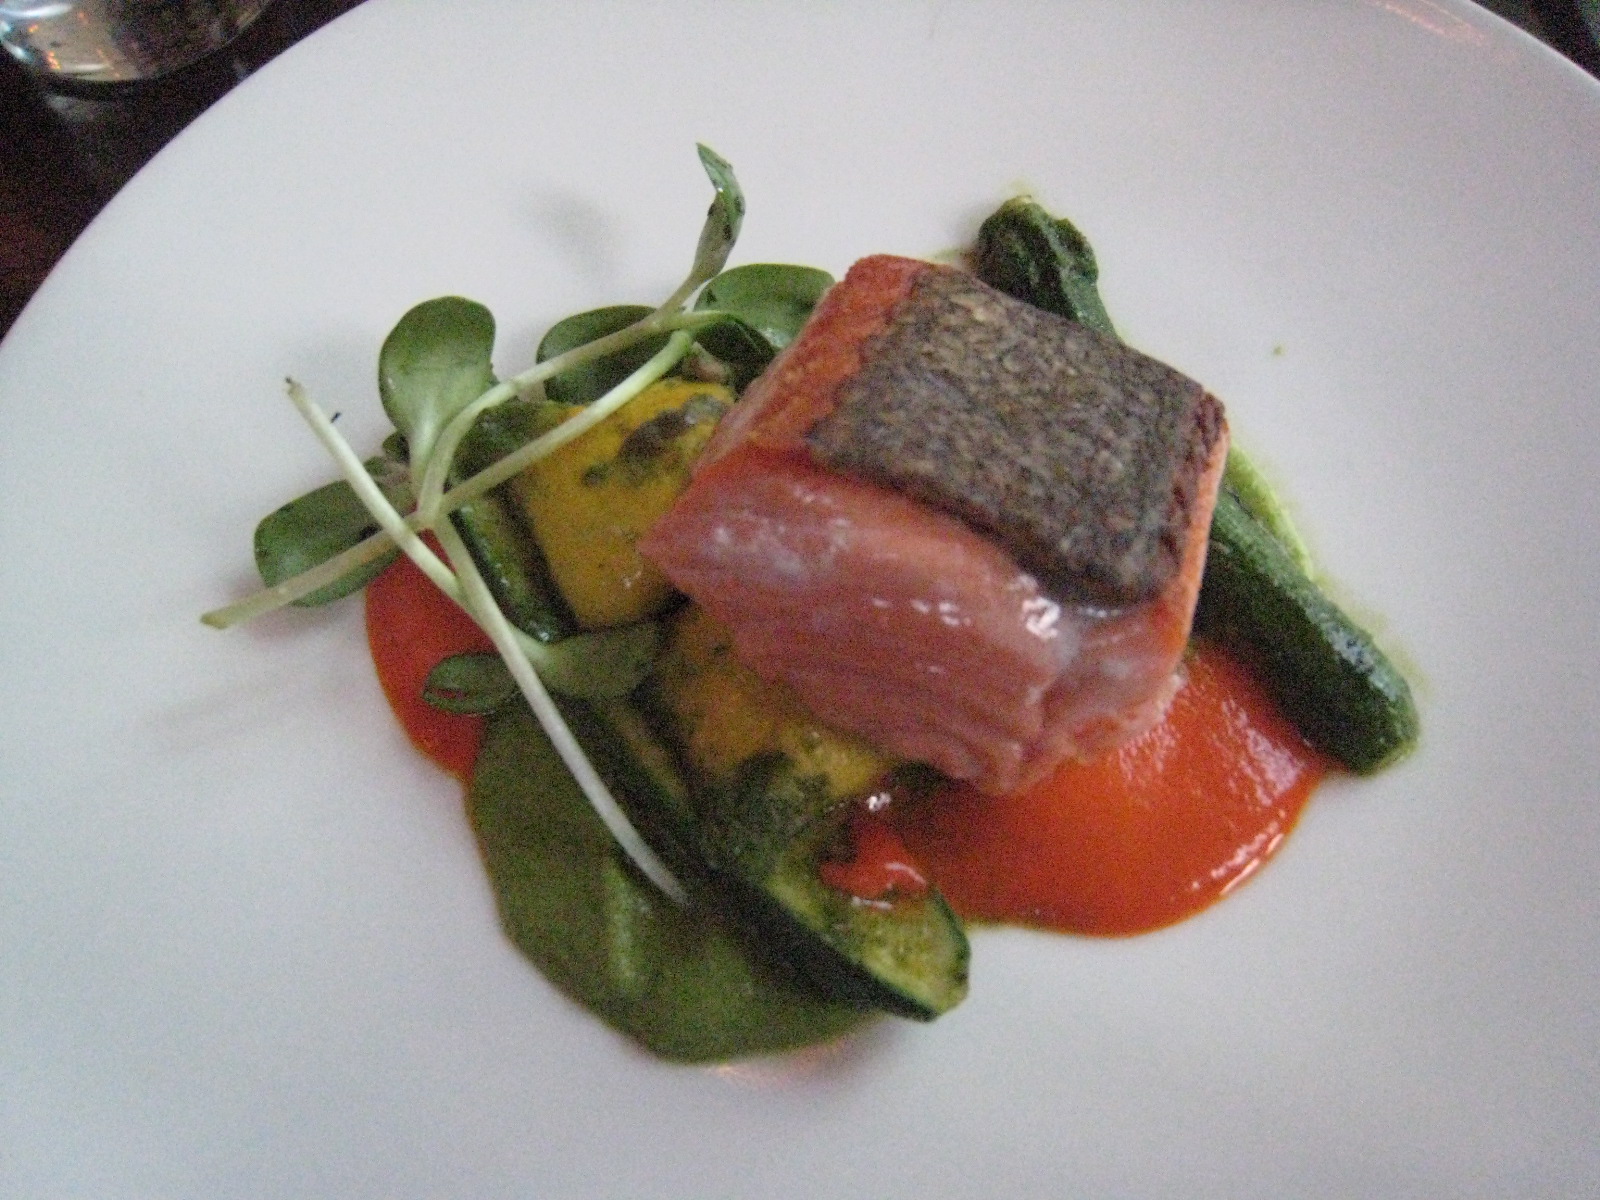
Salmon w/ red pepper purée
We started off with smoked char with crème fresh and chilled pea soup, which was absolutely amazing. I usually don’t like chilled soups, but this worked very well and the slight hint of creme added a lot to the flavor. Between courses, a few sides were tossed out onto the table for all to share. One side that was particularly interesting were fava beans roasted with jalapeños and seat salt. They were a bit messy, as you had to spit out the pods, but were quite tasty.
The main course was salmon, served with baby summer squash and a red pepper purée. Also delightful. I found the salmon perfectly cooked, which I’m a bit picky on. Plus or minus thirty seconds can sometimes make or break a salmon dish, in my opinion.
Dessert was a crème caramel with chocolate, which was the perfect finale to this amazing dinner.
As always, the wait staff provided excellent service and explained each dish in detail. This is, of course, a requirement when you dine with a bunch of foodies. Alternate entrées were also provided for those at the table who couldn’t eat seafood, wheat or dairy. We had a turn-out of eight, and everyone seemed to get along quite well. There was much talk about food, travel, and life in general.
If you live in Seattle (or find yourself in the Seattle area), I’d definitely recommend checking out Restaurant Zoë. I’m sure you’ll have a fantastic time, just as I did!

The group!
